How to manage PTT contacts and groups using the Corporate Administrator Tool (CAT)
As a Bell business customer, you can manage Push-to-talk (PTT) contacts, lists and groups for your organization with the Corporate Administrator Tool (CAT) . It’s quick and easy, and updates are automatically pushed to your Push-to-talk devices.
To access the CAT:
- Go to the Bell Business Portal at https://business.bell.ca/corporateselfserve/login.
- Log in with your username and password.
- Once you’ve signed in, you will see a menu at the top of the page. Click Manage and then click PTT (Corp. Admin. Tool) to access the Corporate Administrator Tool for Push-to-talk service.

- Using the Corporate Administrator Tool, you can:
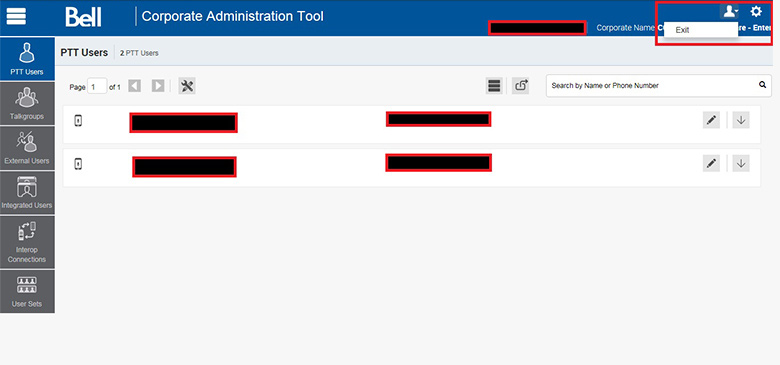
- When you’re finished with your changes, close the tool by clicking Exit in the top-right corner of the page.
Don’t know your login information?
If you don’t know your Bell Business Portal login, please contact a Corporate Client Care representative at 1 800 667-0123.
Operating hours:
8:00 a.m. to 5:00 p.m. ET with technical support available 6:00 a.m. to 12:00 p.m. ET
Integrated messaging, voice message fallback, and location enhancements introduced in PTT 9.0 require a data connection. Standard data charges apply to these features.
If you wish to limit access to these features for users in your organization, you must take steps:
- Data Block SOC – prohibits all data usage, except to support Bell PTT voice calls.
- Bell PTT Corporate Administration Tool (CAT) – enables customers to permit / prohibit access to Integrated Secure Messaging. This would also disable the voice message fallback feature, since it uses messaging to deliver the voice message.
Note: PTT Location Services cannot be suppressed at this time.
Suppressing Integrated Secure Messaging and Voice Message Fallback using CAT
Admins have the option to turn off the integrated messaging feature using CAT. This will also disable the voice message fallback feature, since it uses messaging to deliver the voice message.
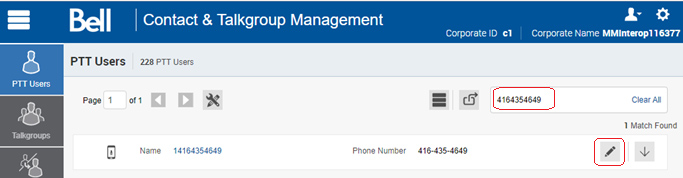
- Within the CAT tool, use the search function on the right side to search for the users profile
and select the edit button denoted by the icon below.
- Once the profile is loaded, select the Features tab and scroll down to the Messaging
section.
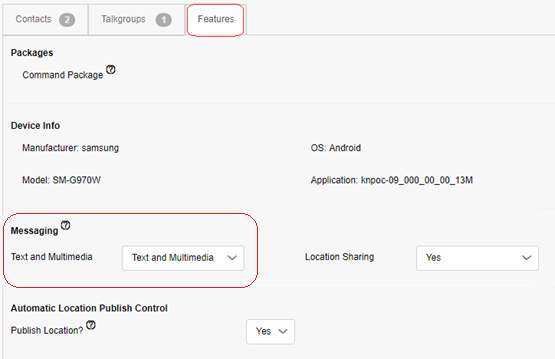
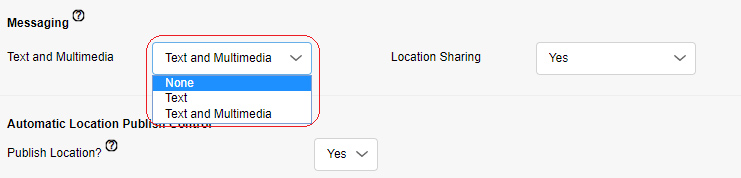
- Messaging features can be suppressed by selecting None under the Text and Multimedia
section.
- In the Push-to-talk Corporate Administrator Tool, click Add External Contact on the left side of the page.
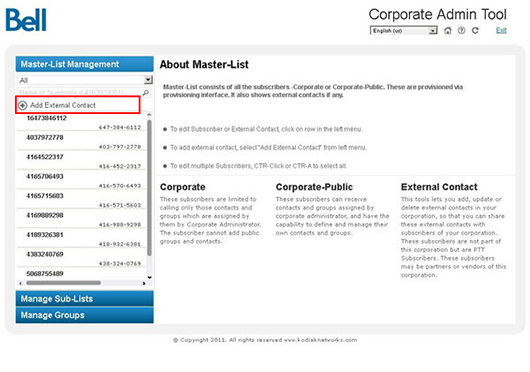
- Enter the contact’s name (max. 30 characters) and 10-digit phone number.

- Click Save to save the contact, or click Cancel to discard the changes.
- In the Master List, external contacts are displayed with an icon next to the name.
To delete an external contact, start by clicking on the contact you want to delete. - The Edit External Contact page will appear. Click the Delete icon in the top-right corner.
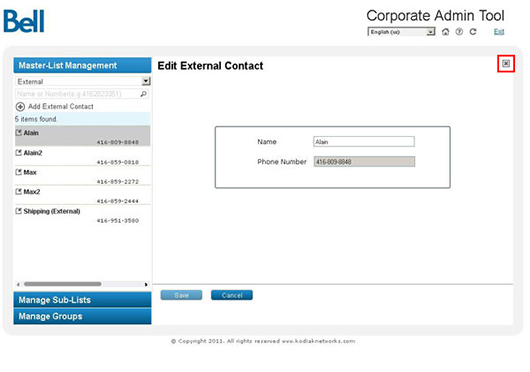
- A confirmation will appear.
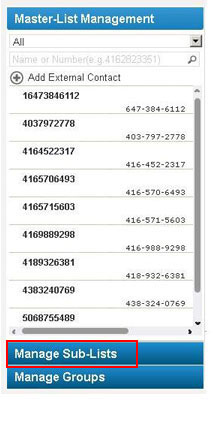
- In the Push-to-talk Corporate Administrator Tool, click Manage Sub-Lists on the left side of the page.
- Click Add New Sub-List.
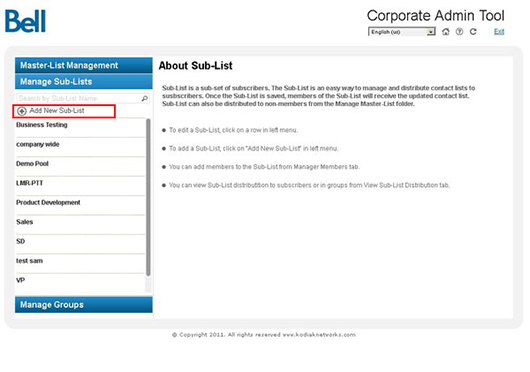
- In the Name field, enter a name for the list.
- Click Add Members to assign members to the list. A pop-up window will appear with a list of available contacts.
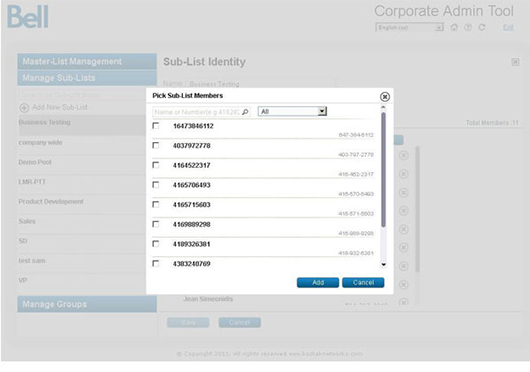
- Select the contacts you want to add to the list, then click Add.
- Click Save. Click OK to save the list, or click Cancel to discard the changes.
To delete assigned members
Click the Delete icon to delete the assigned sub-lists.
The deleted members are removed from the “manage members” view and subsequently the total members count decreases.
- In the Push-to-talk Corporate Administrator Tool, click Manage Sub-Lists on the left side of the page.
- Click the list you want to delete.
- The Sub-List Identity page will appear. Click the Delete icon in the top-right corner. A delete confirmation window is displayed.
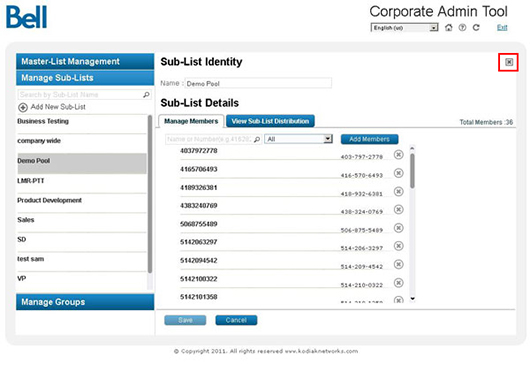
- Click Delete to delete the sub-list. A confirmation message is displayed. Click OK to continue, or click Cancel to stop the deletion.
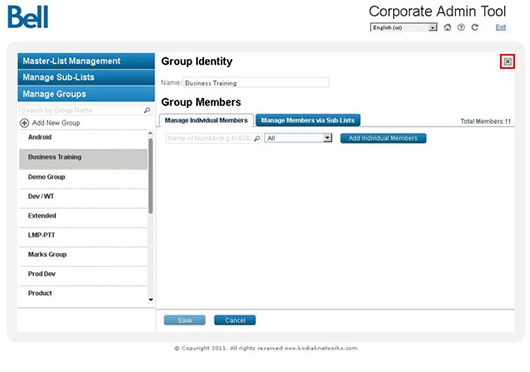
- In the Push-to-talk Corporate Administrator Tool, click Manage Groups on the left side of the page.
- Click Add New Group.

- In the Name field, enter a name for the group.
- Click Add Individual Members to assign members to the group.
- The Pick Individual Group Members window will appear. Select the members you want to add to the group.
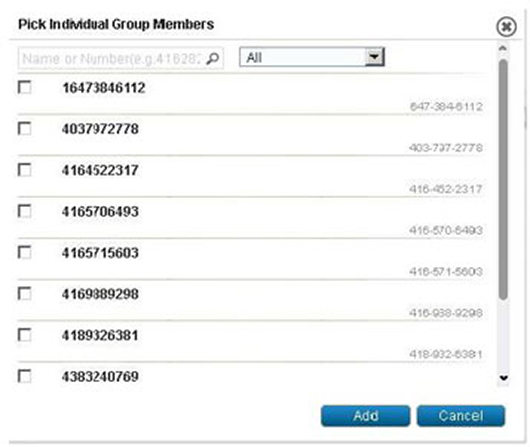
- Click Add to add the members to the group.
- Click Save. Click OK to save the group, or click Cancel to discard the changes.
- In the Push-to-talk Corporate Administrator Tool, click Manage Groups on the left side of the page.
- Click the group you want to delete.
- The Group Identity page will appear. Click the Delete icon in the top-right corner. A delete confirmation window is displayed.
- Click Delete to delete the group. A confirmation message is displayed. Click OK to continue, or click Cancel to stop the deletion.