How to use Bell webmail
To access settings for Bell email, including vacation messages, security settings and changing your password:
From anywhere in Bell email, select the gear icon
 in the upper right of the screen, and then select Settings.
Block and allow lists let you stop receiving email from specific email addresses and domains, identify exceptions and manage blocked messages.
To set up block lists:
- From anywhere in Bell email, select the gear icon in the upper right of the screen, and then select Settings.
- From the menu on the left, select Mail then select Blocked senders.
- Enter the email addresses and domains to be blocked.
- Select Save.
To set up allow lists:
- From anywhere in Bell email, select the gear icon in the upper right of the screen, and then select Settings.
- From the menu on the left, select Safe Sender.
- Enter the email addresses and domains that are safe.
- Select Save.
If you’re getting spam in your Bell email inbox, please mark it as so to help prevent such unwanted messages from being delivered in the future.
To mark a message as spam: There are two ways to mark a message as spam.
- Within the email message, select the Mark as spam icon at the top of the message. When prompted, select Yes to mark as spam.
- Or, while in your inbox, check the box(es) beside the message(s) you want to mark as spam. Select the Mark as spam icon at the top of the list of messages. When prompted, select Yes to mark as spam.
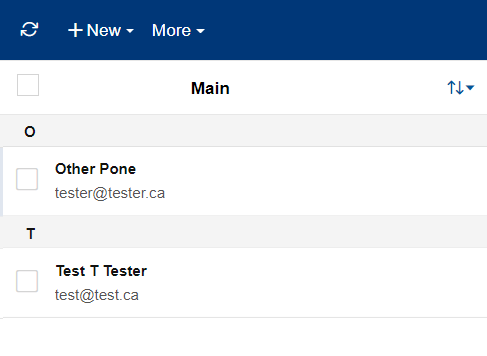
To change how your contacts are displayed:
- On the top menu bar select Contacts.
- Select the up/down arrow to the right of Main to sort your contacts by first name or last name.
To add a signature to your outgoing email:
- From anywhere in Bell email, select the gear icon in the upper right of the screen, and then select Settings.
- From the menu on the left, select Mail then select Signatures.
- Under Signatures, select Include signature.
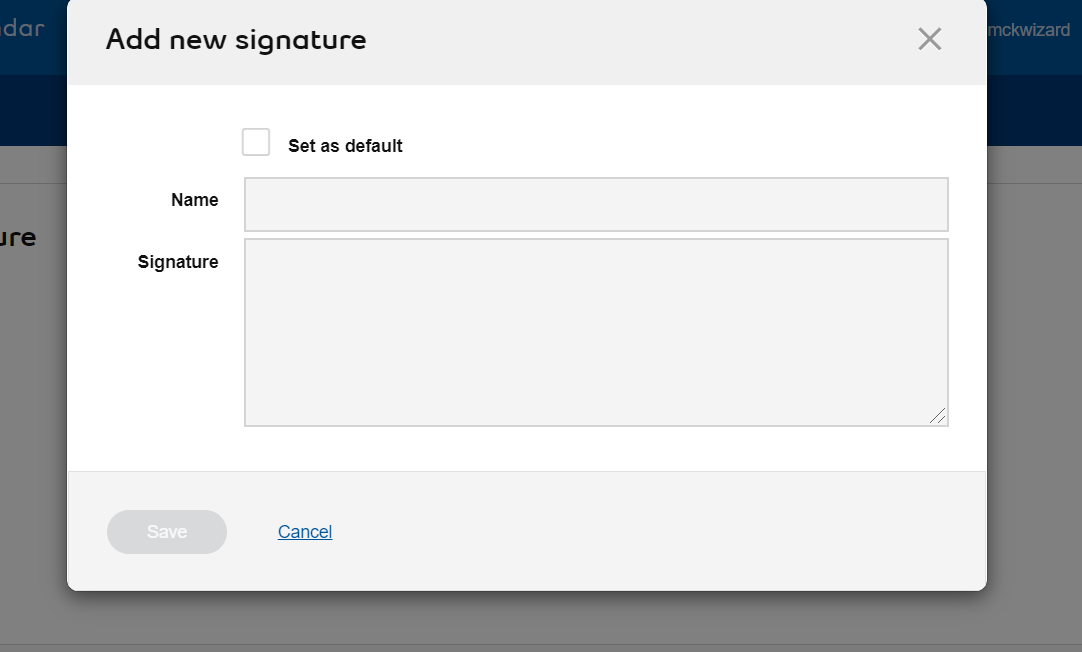
- Select New signature on the right hand side then select plain text or rich text for your signature.
- In the New signature window that appears, you can set the signature as default, name the signature and include the text of the signature.
- Select Save.
Repeat these steps to create additional signatures.
To manage signatures:
Under the list of your signatures you can:
- Set one signature as your default signature.
- Disable a signature by unselecting the Include signature check box.
You can set up automatic replies to let people know you’re on vacation and not able to check email.
To set up a vacation message:
- From anywhere in Bell email, select the gear icon in the upper right of the screen, and then select Settings.
- From the menu on the left, select Mail then select Vacation message.
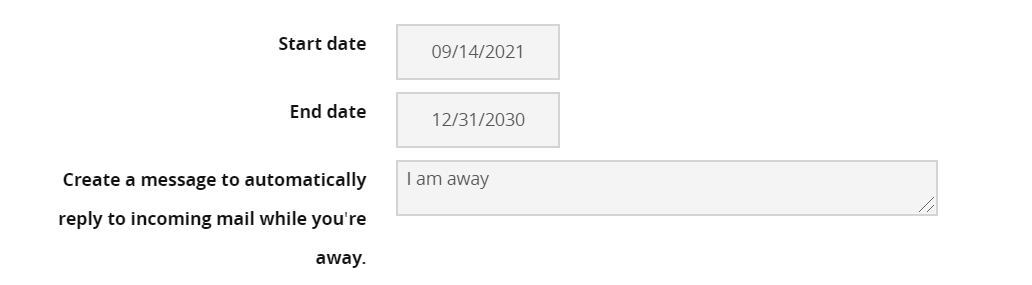
- Type your vacation message in the text box and then select one of the following:
- Do not activate vacation message to turn off your vacation message.
- Reply every time to send your vacation message every time you get an email.
- Reply every time and append original message to send your vacation message along with the original message, every time you get an email.
- Reply once to each sender to send your vacation message only once to each sender.
- Confirm your vacation message start and end dates and select Save to begin sending vacation messages.
To manage the way Bell email checks your email for viruses:
- From anywhere in Bell email, select the gear icon in the upper right of the screen, and then select Settings.
- From the menu on the left, select Mail then select Security.
- Under Virus, select how you would like Bell email to check for viruses.
- Select Save.
You can choose to have your email forwarded to another email address or addresses.
To manage mail forwarding:
- From anywhere in Bell email, select the gear icon in the upper right of the screen, and then select Settings.
- From the menu on the left, select Mail Forwarding.
- Enter up to 10 email addresses where you want your email forwarded. Separate each address with a comma.
- Select one of the following options:
- Disable forwarding to turn off mail forwarding.
- Forward and keep a copy to forward your email and keep a copy.
- Forward, then discard to forward your email without keeping a copy.
- Select Save.
Reset your password through MyBell:
If you forgot your email address or need assistance, you can visit Managing my Bell email address and password.
Change your password through webmail:
- From anywhere in Bell email, select the gear icon in the upper right of the screen, and then select Settings.
- Select Change password from the menu.
Printing an email:
There are two ways to print an email message.
- Within the email message, select the menu icon
 at the top right of the message and then select Print email.
 - Or, while in your Inbox, check the box beside the message(s) you want to print. Select More on the toolbar and then select Print email.
Replying to an email:
- Open the message you want to reply to.
- In the toolbar, select either
- Reply to reply only to the sender, or Reply All to reply to everyone who received the message (including the sender).
- Or, right click anywhere in the message and select Reply or Reply All from the menu that appears.
- Type your reply. If you want to attach any files to your message, select Attach in the toolbar.
- Select Send when you’re ready to send the message or Save to save it and send it later.
Adding an attachment to an email:
- On the Mail tab, select Compose.
- Drag and drop files from your computer to anywhere on the compose screen. Or, select Attach files.
Adding an appointment to the calendar:
- On the Calendar tab, select New.
- Enter the information for your appointment.
- When you are done, select Save.
Creating a new calendar:
You can have multiple calendars in Bell email. All calendars can be managed separately, or you can choose to have all events from all your calendars appear on one screen.
To create a new calendar:
- On the Calendar tab, select New calendar.
- Enter a name for the calendar and then select Save.
Adding a new task or task group:
- On the Tasks tab, select New.
- When you are done, select Save.
- On the Tasks tab, select the plus sign + beside My tasks.
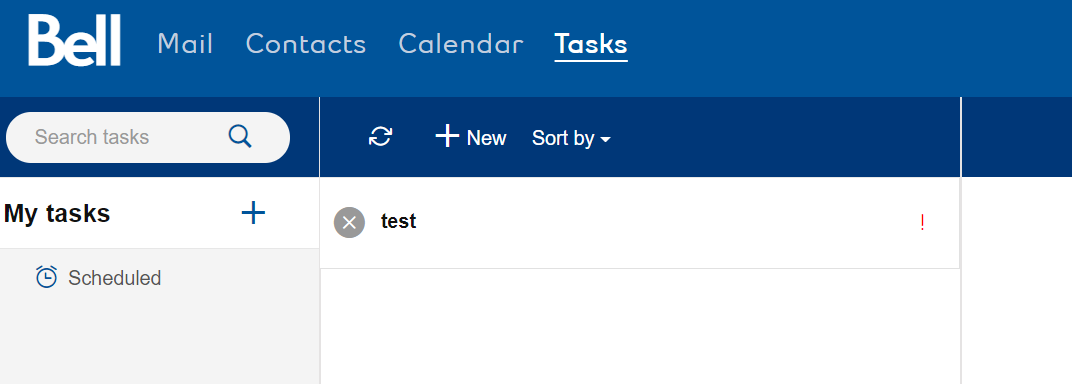
- Enter a name for the task group and then select Save.
To add a task:
To add new task group:
To ensure you can access your Bell email, you need the following software. This does not affect your login information and stored messages.
Supported browsers and operating systems
Browsers- Desktop and mobile Internet Explorer 11
- Microsoft Edge
- Mozilla Firefox 27 and higher
- Google Chrome 30 and higher
- Android 5.0 and higher
- Mobile Safari 5 and higher for iOS 5 and higher
- Desktop Safari 7 and higher for OS X 10.9 and higher
- Windows XP SP3
- Windows 7 SP1
- Windows 8.1
- Windows 10
- MAC OS X 10.9 and higher
- Airwatch
- Android 5.0 to 8.1 and Android P
- iPhone OS 5 to 11
- MobileIron Core 9.5 and higher
- MobileIron Cloud
- Windows Phone 8.1
- Windows 10 Mobile v1511, v1607, v1703 and v1709
.png)